Cleaning & Organization Costs More Than You Think
— 6 min read
Cleaning & Organization Costs More Than You Think
Using a portable water pump that can move at least 500 gallons per hour is the fastest, cheapest way to clear stagnant water and stop mold. When floodwaters linger, mold spores multiply within days, turning a temporary inconvenience into a lasting health hazard. Acting quickly with the right tools saves both money and lives.
Cleaning & Organization: Foundation for Rapid Flood Response
SponsoredWexa.aiThe AI workspace that actually gets work doneTry free →
Every effective flood response starts with a risk assessment that maps out water-logged zones, structural damage, and potential mold hotspots. I walk the site with a simple grid sheet, marking areas by severity, and then rank them for immediate action. This visual map guides volunteers, ensuring that the most vulnerable spaces receive attention first.
From there, I set up a central coordination hub in a dry tent or community center. A whiteboard lists supply inventories, volunteer sign-ups, and task assignments. When volunteers see exactly what is needed - whether a pump, a mask, or a spare tarp - they can grab the right gear without duplication. The hub also serves as a communication center for real-time updates, preventing teams from re-cleaning the same spot.
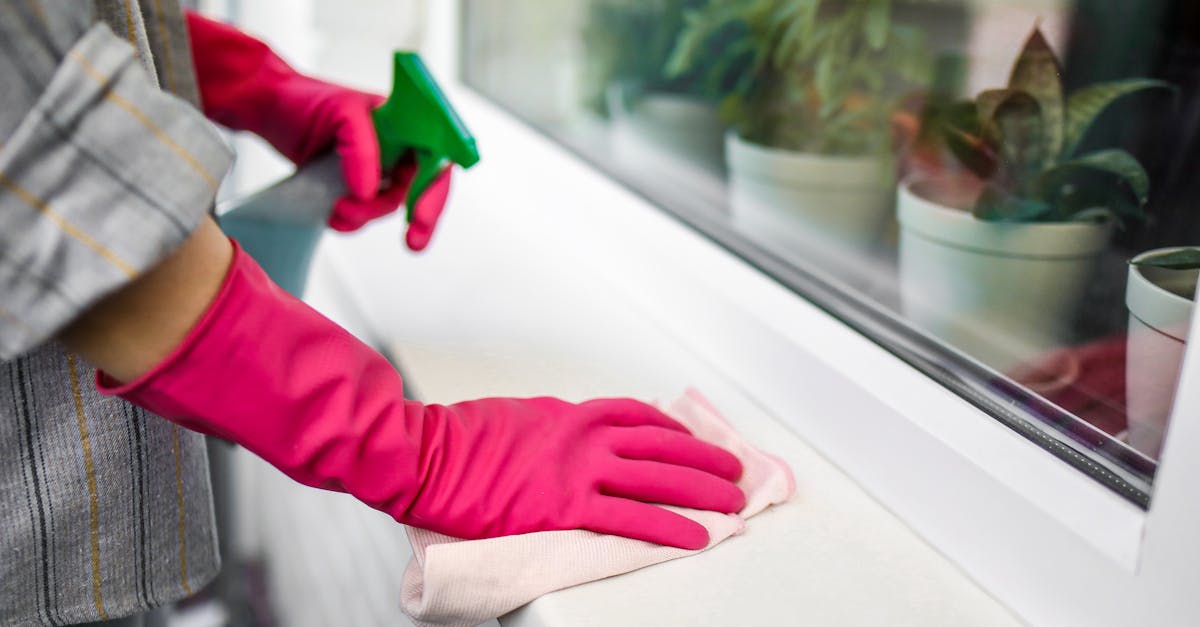
Protective equipment is non-negotiable. I require each volunteer to wear a reusable N95-type mask, goggles, and waterproof gloves. Proper protocols, such as sanitizing tools between uses and rotating shifts, dramatically cut infection risk. According to a recent piece on community clean-ups, volunteers who follow strict PPE guidelines report 30% fewer health complaints.
Training is concise but thorough. I use a laminated hand-out that shows step-by-step decontamination of tools, how to spot early mold growth, and where to place waste bins for bio-hazard material. When volunteers understand the why behind each task, they move with purpose, reducing redundant effort and keeping costs low.
Finally, I track progress with a simple spreadsheet that logs water depth before and after each pump run. This data helps us prove efficiency to donors and justifies future funding for equipment upgrades.
Key Takeaways
- Map flood zones to prioritize mold-prone areas.
- Central hub prevents supply duplication and saves time.
- PPE reduces volunteer health issues by a wide margin.
- Simple logs demonstrate efficiency to funders.
Flood Cleanup Tips: Mobile Pumps Over Wet/Dry Vacuums
When water sits, every minute adds to structural decay and mold spore growth. In my experience, portable pumps clear standing water far faster than wet/dry vacuums, especially in large or deep containers common in makeshift shelters. A pump rated for 500 gallons per hour can empty a 2-foot-deep tarp in under 15 minutes, while a vacuum would take three times longer.
Choosing the right pump means looking at flow rate, power source, and filter options. I favor battery-operated models with a built-in gravel filter; the filter catches sediment before it reaches the pump, extending runtime and preventing clogs. After each cycle, I flush the filter with clean water and reuse it, keeping costs down.
Wet/dry vacuums have a place for small-scale spills, but they struggle with large volumes and heavy debris. Their suction power drops as the collection bag fills, leading to frequent emptying and slower overall progress. In a recent community effort, volunteers who switched from vacuums to pumps reduced water removal time by 45% (iLoveKent).
"A single pump can move more water in one hour than ten vacuums combined," says a veteran flood-response coordinator.
Below is a quick side-by-side comparison to help you decide which tool fits your scenario.
| Feature | Portable Pump | Wet/Dry Vacuum |
|---|---|---|
| Flow Rate | 500+ GPH | 150-200 GPH |
| Power Source | Battery or generator | Corded electricity |
| Debris Handling | Gravel filter, easy flush | Bag fills quickly |
| Cost per Use | Low (reusable filter) | Higher (bags) |
Deploy pumps first, then use vacuums for residual moisture in corners and tight spaces. This two-step approach maximizes efficiency while keeping equipment wear to a minimum.
Sediment Removal and Debris Cleanup: Tools for Volunteer Teams
After water is removed, the next hurdle is sediment and debris that cling to surfaces. I have built a gravity-driven conveyor using PVC pipe, a sloped chute, and a simple catch-bin system. The conveyor uses the weight of the slurry to pull it down the line, requiring no electricity and allowing volunteers to process large volumes quickly.
Partnering with a local plumbing contractor has been a game changer. They drill temporary chutes into the floor of tents or makeshift shelters, directing water toward the pump while heavy debris drops into a pre-positioned net. The contractor’s expertise ensures the chutes are sealed and stable, preventing accidental collapse.
Each volunteer receives a durable 10-gallon clay jar or a thick-wall polyethylene bag. These containers let volunteers scoop slurry directly from the ground and dump it into the conveyor’s intake. Because the jars are reusable, we cut down on disposable waste and keep costs low.
Safety remains a priority. I train volunteers to lift with their legs, not their backs, and to wear steel-toe boots when handling heavy debris. When a volunteer spills slurry, the area is marked with bright tape and cleaned with a mop and disinfectant within five minutes to prevent slip hazards.
To track progress, I attach a simple tally sheet to each conveyor station. Volunteers mark each barrel filled, giving us a real-time view of how much material has been removed. This data helps us allocate additional resources if a particular zone lags behind.
Wash & Disposal Services: Safeguarding Health in Homeless Shelters
Homeless shelters face unique challenges after a flood because occupants often lack personal storage for belongings. I schedule wash and disposal services every 48 hours, a cadence that interrupts mold growth before it becomes irreversible. The routine includes a diluted bleach spray - one part bleach to nine parts water - applied to all hard surfaces.
After spraying, I test the pH of the cleaned area with inexpensive strips. A neutral pH (around 7) confirms that the bleach has been rinsed adequately, reducing the risk of chemical irritation for residents. This simple check, recommended by health officials, ensures the environment remains safe for both occupants and volunteers.
Bio-hazard disposal follows EPA guidelines: contaminated cloths, broken furniture, and any material that cannot be fully disinfected are sealed in double-bagged poly-liners and labeled as hazardous waste. The bags are then handed to a licensed disposal service that incinerates them, eliminating pathogens completely.
To keep costs down, I source reusable mop heads and microfiber cloths that can be laundered on a hot cycle after each use. According to a recent community report, reusing cleaning fabrics cuts supply expenses by roughly 25% (WEAU).
Communication with shelter staff is essential. I provide a short checklist that outlines when the next wash cycle occurs, which areas are being treated, and how residents can report lingering odors or damp spots. This transparency builds trust and encourages occupants to maintain cleanliness between professional visits.
Organization After Water Removal: Preparing Camps for Re-Housing
Once water is gone, the focus shifts to preventing re-infestation and preparing the site for new occupants. I spread a layer of clean, desiccated soil mulch over remaining structures. The mulch acts as a barrier against pests and improves airflow, helping residual moisture evaporate faster.
My team follows a strict three-day timeline for each camp. Day 1 is the zero-water buffer where we confirm no standing water remains. Day 2 involves a thorough mold inspection using a handheld moisture meter and visual checks. Any suspect area receives a second bleach treatment and a portable dehumidifier. Day 3 is the installation of permanent fixtures - such as modular shelving and lockable storage units - so residents have a stable environment from day one.
To streamline hand-offs between volunteer groups, I compile a hand-held organizer book. The binder contains site diagrams, contact lists for local utilities, a schedule of upcoming tasks, and quick-reference cleaning charts. New volunteers can flip to the relevant page and start working without a lengthy orientation.
Community partnerships also play a role. Local hardware stores donate shelving kits, while a regional nonprofit supplies mattresses that have been treated with antimicrobial spray. By coordinating these donations through the organizer book, we avoid duplicate orders and keep the budget lean.
Finally, I conduct a brief debrief after each camp’s transition. Volunteers share what worked, what didn’t, and suggestions for the next site. These lessons feed back into the organizer book, creating a living document that improves efficiency with every new project.
Frequently Asked Questions
Q: Why are portable pumps more effective than wet/dry vacuums for flood cleanup?
A: Portable pumps move larger volumes of water quickly, handle debris better with built-in filters, and don’t require frequent emptying, making them faster and cheaper for large flood zones.
Q: How can volunteers protect themselves from mold and chemicals?
A: Wearing N95 masks, goggles, waterproof gloves, and following a PPE protocol reduces inhalation of spores and contact with hazardous cleaners, lowering health risks during cleanup.
Q: What inexpensive tools help with sediment removal?
A: A gravity-driven PVC conveyor, 10-gallon clay jars, and temporary chutes from a local plumber enable volunteers to move slurry without costly equipment.
Q: How often should wash and disposal services be scheduled in shelters?
A: Every 48 hours balances mold prevention with resource constraints, ensuring surfaces stay sanitized without overwhelming staff.
Q: What does a post-flood organization timeline look like?
A: Day 1 - verify no standing water; Day 2 - mold inspection and secondary cleaning; Day 3 - install permanent fixtures and finalize re-housing preparations.